Video Conference Monitor Setup: Camera & Lighting
By Elena Petrovic • 11th Mar
A video conference monitor setup matters more than most people realize. Your camera angle, lighting geometry, and monitor stability collectively determine whether you appear engaged or distant, whether colors render truthfully, and whether the person on the other end sees a sharp, composed image or a jittering, washed-out one. This is not merely about aesthetics, it's about the optical path. Hybrid work webcam accessories, mounting hardware, and light placement are not afterthoughts; they form the backbone of a setup that holds consistency across dozens of calls each week.
The Foundation: Monitor Positioning and Stability
When I began optimizing conference setups, I discovered something counterintuitive. A monitor arm with loose tolerances (one that allows millimeter-level sway when you rest your wrist on the desk or adjust during a call) can shift reflections and apparent contrast enough to make blacks feel muddy and whites feel bloated. Stability compounds image quality. It is not just ergonomics; it is optical physics.
Start with display height. Research confirms that camera placement at eye level creates the most natural "face-to-face" feel, with participants perceiving proper eye contact[2]. Eye level for seated individuals averages 46 to 50 inches (116 to 127 cm) from the floor[1]. If your monitor sits lower (perched on a desk riser or a shallow stand), both you and the camera angle suffer. Your chin points down, creating unflattering shadows. Remote participants look up at you. The camera sees poor sightlines to others in the room.
For monitor selection, sizing matters. If you're using a single display, divide your furthest viewing distance by 4 to determine the minimum screen height[1]. In a home office, a 27" to 32" display typically fits the math. In shared conference rooms, 55" or larger becomes necessary[2].
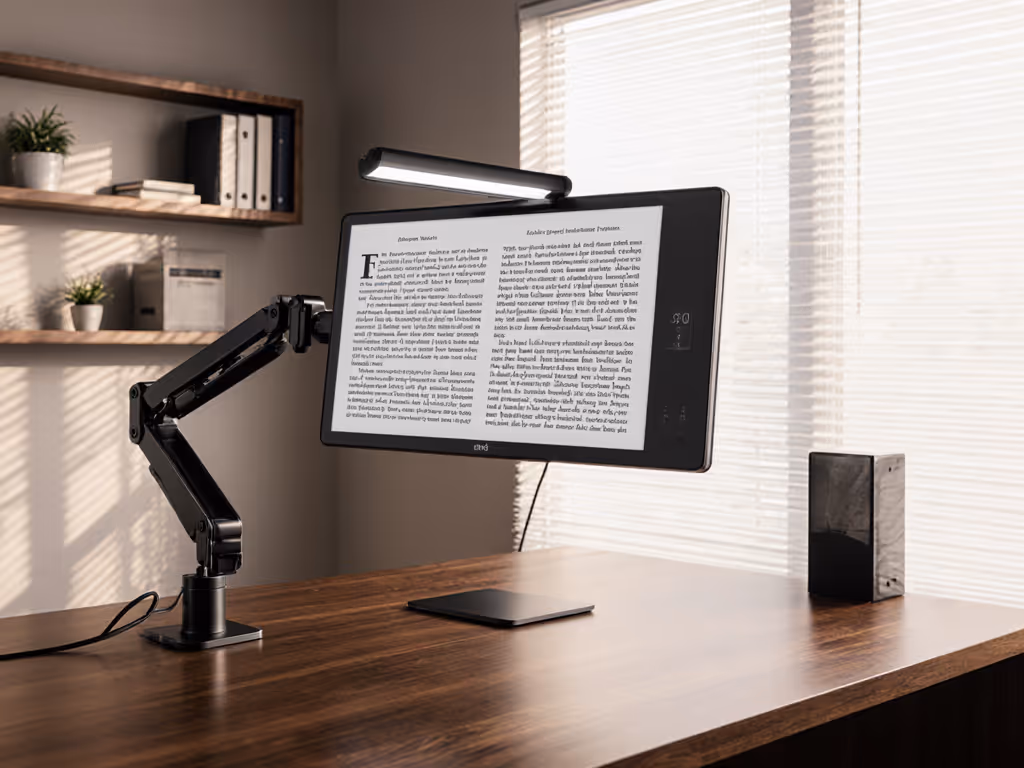
But size means weight and mass. A 32" 4K display can weigh 15 to 20 lbs; curved ultrawide panels push heavier still. Your mounting arm must handle that mass plus account for center-of-gravity offset when the display is angled. A monitor arm rated for 17 lbs performing well at 10 lbs under ideal conditions will sag and drift with a heavier curved panel. The sway is subtle (often imperceptible in a still image), but visible the moment you scroll or adjust framing during a call. The light path becomes unstable. Perceived blacks shift. Color consistency dissolves.
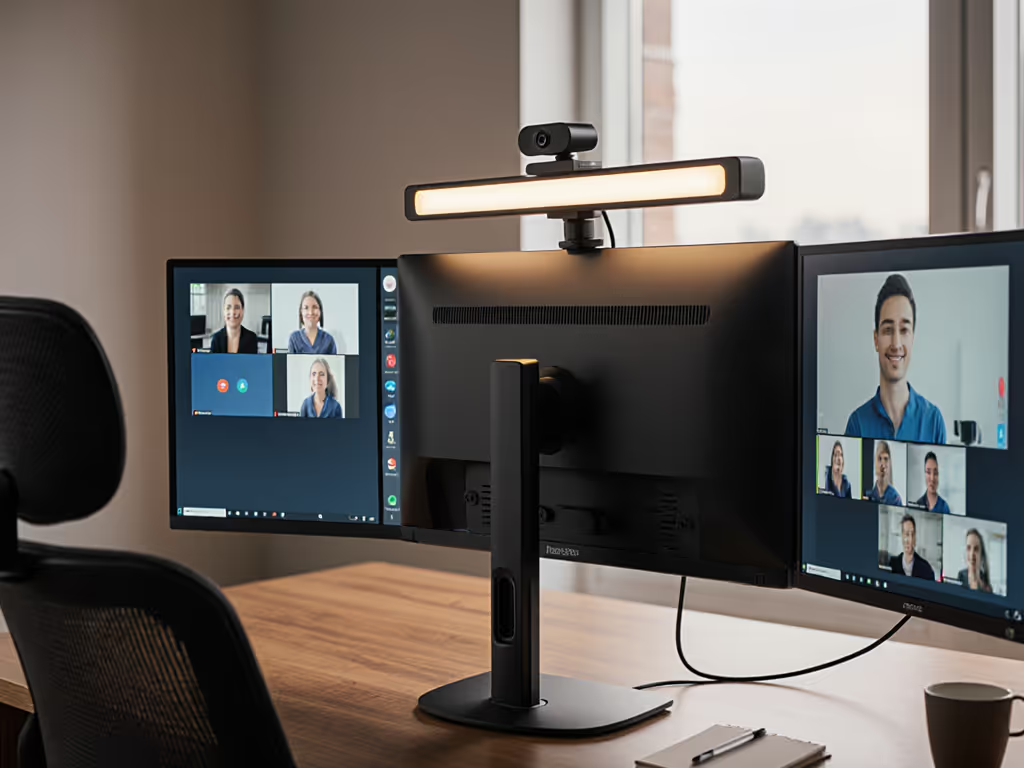
When evaluating monitor-mounted camera solutions, verify that your arm's maximum reach and load capacity accommodate both the display and an external camera. Many webcam bars weigh 1 to 3 lbs. If your arm is already at its limit with the monitor alone, adding a camera turns it into a leverage problem.
Color accuracy includes the mount, the cables, and the light.
Cables compound the issue. For tidy, low-tension routing that preserves stability, see our monitor cable management guide. A loosely routed HDMI or USB-C cable, when draped over the arm itself or kinked at the display, introduces subtle tension that encourages sway. Route cables through a management sleeve or loom, run them away from the pivot point, and use cable clips to anchor them to the desk. This is not cable hobbyism; it is structural integrity.
Camera Angle and Field of View
Your camera placement determines what the other person sees. For accessory picks that directly improve framing and clarity, check our video call monitor setup guide. The goal is not to maximize what you can capture; it is to position the lens so that your face and shoulders fill the frame proportionally, your eyes sit in the upper third of the image (a composition principle that feels natural), and your gaze aligns with the viewer's sense of "looking at" rather than "looking past."
Place your camera at or slightly above eye level[1][2]. If that's not possible (for instance, if your monitor sits lower than optimal), select a camera with motorized pan-and-tilt capability to adjust the viewing angle[1].
Field of view (FOV) is critical for context. In a huddle room (2 to 4 people sitting close to a small display), a 120-degree wide-angle lens ensures people at the edges aren't cropped out[2]. In a larger space, a narrower FOV (around 80 to 90 degrees) with pan-tilt-zoom (PTZ) capabilities adapts to speaker position, keeping the frame intentional rather than cavernous[3]. A wide FOV in a small, close space inflates faces and distorts proportions. A narrow FOV in a large room leaves empty space and makes participants feel remote even when present.
Camera resolution matters for readability. Aim for at least 1080p, with 4K recommended for larger spaces or when shared content requires clarity[3]. But resolution alone won't save a poorly lit or unstably mounted camera. A 4K feed from a wobbly mounting point appears soft and unreliable to viewers, undercutting the apparent quality.
Lighting and the Light Path
Lighting is the most overlooked variable in conference setup. Poor lighting doesn't just make you look tired; it forces the camera to overexpose, crush blacks, or introduce noise as it struggles to maintain exposure. Remote participants lose the ability to read your expression.
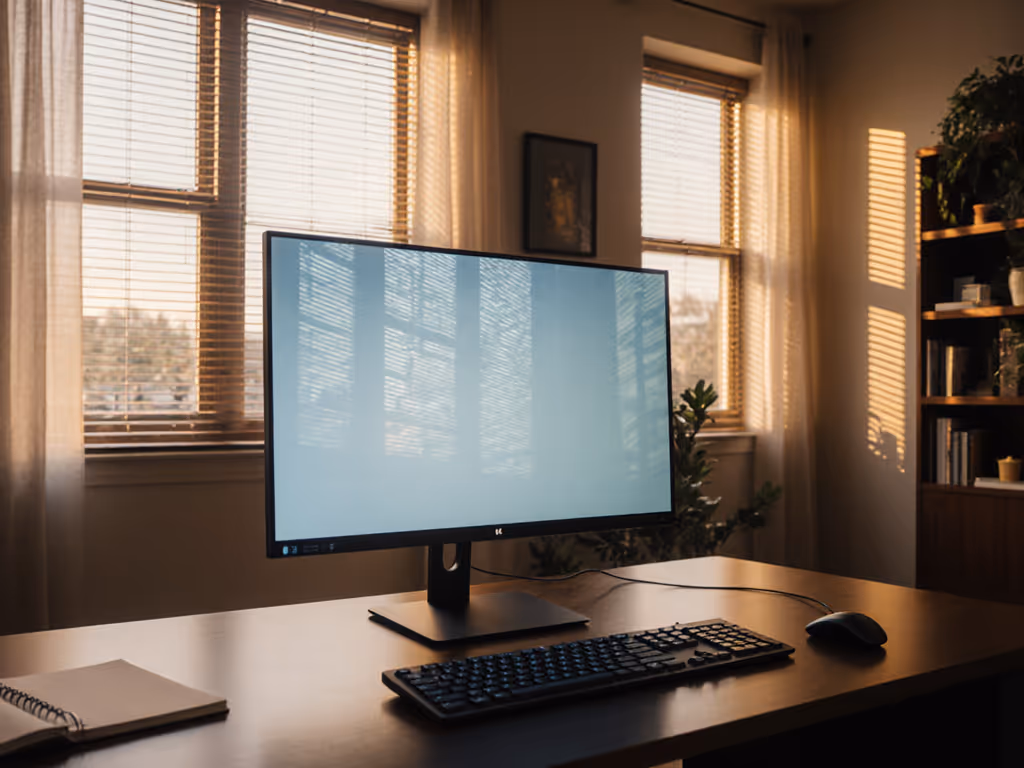
Never position your camera facing a window[2]. Backlit scenes (sunlight from behind you) turn your face into a silhouette. The camera's auto-exposure meter reads the bright background and darkens everything in front of it, rendering your features nearly invisible. If your desk must face a window, draw curtains during calls or reposition your monitor to face away from the glass.
Use forward-facing, cool-white lighting to ensure skin tones remain natural and consistent[2]. "Cool white" typically means 5500 to 6500 Kelvin (the color temperature of daylight), which avoids the orange cast of warm indoor bulbs and the cyan cast of overly cool LEDs. Position light sources 3 to 5 feet in front of and slightly above your eye line, so light falls on your face at a gentle angle rather than straight-on (which creates a flat, shadowless appearance) or from above (which creates unflattering under-eye shadows).
For video conferencing, avoid unshielded fixtures that reflect directly into your camera lens or cast specular highlights on your monitor. A glare-prone glossy screen with reflected overhead lights will appear washed out and unprofessional on the call. Matte or anti-glare coatings on your display help mitigate this, though they reduce contrast slightly[5].
If you're working in a color-critical or creative role (editing, design, or streaming alongside conferencing), lighting takes on additional weight. Ambient light color casts your monitor's output. A warm-tinted room light makes your display appear cooler by comparison, pushing you toward slightly warmer edits than your monitor actually displays. Neutral, stable light in the 5500K range decouples your lighting from your color perception, letting your display settings remain predictable. Adding subtle monitor bias lighting behind the display can reduce eye strain and enhance perceived contrast during long calls. This consistency matters more than you'd expect across a day of calls and simultaneous color work.
Mechanical Stability as Part of the Image Pipeline
All of this (monitor height, arm load capacity, cable routing, camera placement, and lighting geometry) exists within a larger principle: mechanical and environmental stability are as vital as gamut or resolution. Your setup's stability directly impacts how you are perceived on camera.
When your monitor or camera moves imperceptibly during a call (a sub-perceptual sway of a few millimeters), it shifts reflections and alters the apparent contrast of your face. Viewers don't consciously notice the movement, but they register something "off." In a grading session, I once isolated this exact problem: a loose monitor arm with tolerances in the base allowed micro-motion whenever I scrubbed the panel or adjusted settings. After replacing the arm with a heavier, damped unit and rerouting cables away from stress points, stability returned. Blacks were blacks again. Highlights held their place. My face on the call feedback monitor looked sharp (not because I changed lighting or camera, but because the optical path had solidified).
For your setup, test your arm's stability. Press firmly on the top corner of your monitor: the display should not wobble or drift back. If it does, either the arm needs adjustment (tightening tension screws, rebalancing weight), a heavier-duty arm, or repositioning of the camera and cables to reduce off-axis load.
Display Settings and Optimization
Once your monitor is mounted and stable, review its video settings. Displays often ship with aggressive color processing aimed at television viewing ("vivid" modes, dynamic contrast, and edge enhancement) that make text pop but make faces look artificial on video calls. Disable these modes or set them to minimum[1]. If your display offers a "Game Mode," it often provides good performance with the least processing, making it suitable for conference use[1].
Set brightness and contrast to neutral starting points. A display too bright will bloom and oversaturate skin tones; one too dim will crush shadow detail and make you appear gaunt. Aim for a display brightness around 100 to 120 cd/m² in a typical indoor environment. Measure this with a light meter if you're doing color work, or compare your monitor's brightness to a piece of white printer paper under your room's ambient light, the paper should appear slightly brighter than your display (this is the "paper white" reference).
Putting It Together
A complete video conference monitor setup checklist:
- Monitor height and stability: Eye level (46 to 50"); stable, damped arm with proper load rating and cable management.
- Camera placement: At or above eye level; appropriate FOV for room size; resolution 1080p minimum, 4K for larger spaces or shared content.
- Lighting: Cool-white (5500 to 6500K) fixtures, forward-facing, 3 to 5 feet in front; no backlighting or direct reflections into lens or screen.
- Display settings: Video processing disabled or minimized; brightness 100 to 120 cd/m²; contrast neutral.
- Cable routing: Secured, routed away from pivot points, not creating tension on arms or mounts.
These elements combine to create an image that is stable, color-consistent, and represents you as composed and intentional on every call.
Further Exploration
As you refine your setup, consider benchmarking your current configuration. Record a short test call with screen capture to observe your framing, lighting, and apparent stability from the other participant's perspective. For meeting-heavy workflows, see our dual-screen video call setup guide to keep agendas, notes, and faces visible at once. This quick diagnostic often reveals misalignments you can't perceive in the moment. Compare your on-camera appearance with your setup's physical measurements, does your eye level match the camera's frame? Does light fall naturally? Are there reflections? Each observation informs the next adjustment, moving you toward a setup that works every time, across dozens of calls, without drift or surprise.