Verified Quick-Deploy Bundle for Co-Working: $200
By Sofia Jimenez • 10th May
You're hunting for a co-working space monitor bundle that won't betray you mid-week. Maybe you're a digital nomad workspace under $200 builder, rotating between shared desks and coffee shops. Or you're arming a team at a startup that just rented open-plan office space. Whatever your scenario, the pain is familiar: monitor arms that sag, cables that don't work together, clamps that won't grip, and the creeping dread of returns.
I learned this the hard way. I shipped three returns chasing the perfect setup (each one a silent tax on time and confidence). The dock didn't have enough power for my laptop. The arm hit the shelf behind my borrowed desk. The cable spec was wrong, and I couldn't push the refresh rate I'd paid for. What changed everything wasn't spending more money. It was spending five minutes on a preflight checklist before I bought anything.
This guide is that checklist, expanded into a step-by-step blueprint. Start with a preflight, end with a first-time fit. No surprises, no returns, no wasted weeks troubleshooting compatibility.
Step 1: The Desk Preflight - Measure Before You Choose
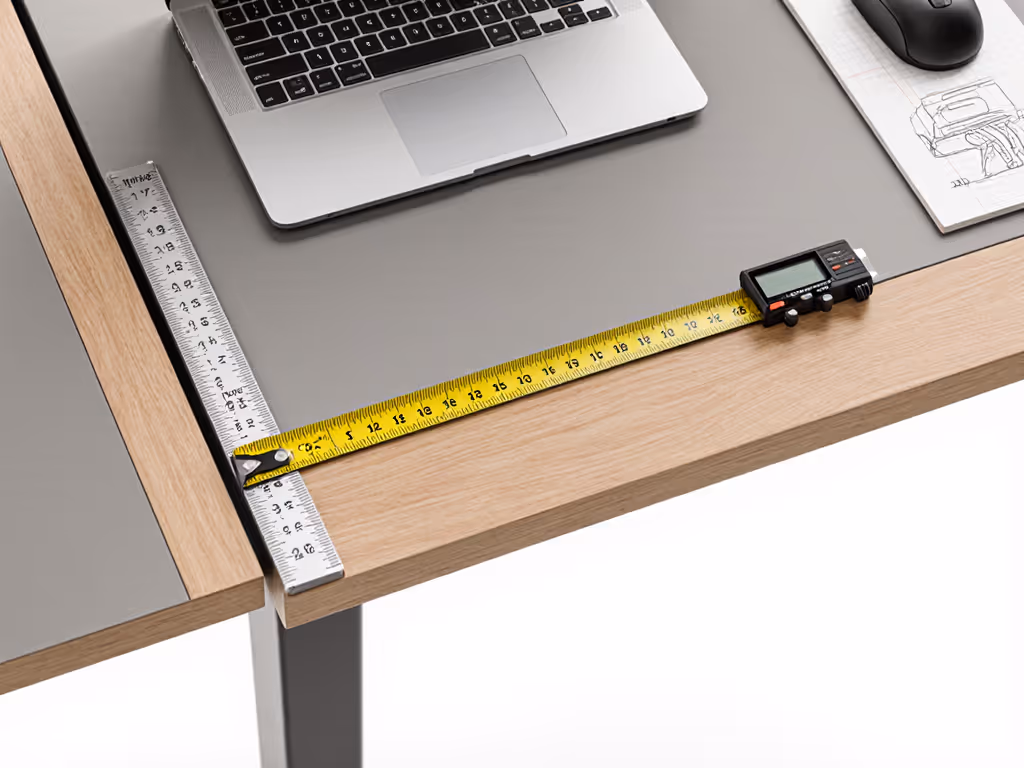
The most expensive mistake happens before checkout. You imagine your monitor clamped to the desk, cables routed neatly, everything stable. Reality looks different when the clamp diameter is 0.2 inches off, or the desk overhang is too shallow to clear a keyboard.
Grab a tape measure and spend five minutes taking these measurements: If you're unsure about mount style or desk thickness limits, our clamp vs grommet vs bolt test shows real fit ranges.
Measurements to Record
- Desk edge thickness (top to bottom): Standing desks are typically 1-1.5 inches; office tables vary wildly (0.5-2 inches). Your mounted monitor stand clamp must fit this range. Too thin, and the clamp slips; too thick, and it won't close.
- Usable overhang (clamp position to front desk edge): You need 4-8 inches of clear space so your monitor doesn't obstruct your keyboard or lap when seated. Measure from where you'd place the clamp.
- Desk depth (front edge to back): Co-working desks often run shallow (20-24 inches). A 27-inch monitor on a shallow desk forces your neck to crane or pushes your keyboard into your stomach.
- Obstructions: Standing desks sometimes have a horizontal support bar or cable tray underneath. An arm clamp won't attach if the bar blocks it. Identify these before ordering.
- Surface material: Wood, metal, laminate, or glass? Glass-top desks need a non-marring clamp pad; metal surfaces might need an adapter plate to avoid slipping or marking.
Preflight checklist:
- Desk thickness measured and compared to arm clamp range
- Overhang distance recorded
- Desk depth mapped against monitor diagonal size
- Cable trays or support bars documented
- Surface material and clamp pad requirements noted
Step 2: Monitor Specs & Power Budget - Know What You're Powering
Before picking a cable or dock, identify what you're driving and how much power it demands. Vague specs create failures. Precision prevents them.
Your Monitor: Three Critical Specs
Resolution and refresh rate: A 1080p@60Hz display draws minimal power and bandwidth. A 1440p@144Hz monitor or 4K@120Hz display demands more. If you're sharing a co-working desk, the monitor might be pre-installed at 1080p60 - fine for email, documents, and Zoom calls. If you're bringing your own, clarify your use: office work (60-75Hz is enough), casual gaming (120-144Hz desired), or professional color-critical work (60Hz with wide gamut and calibration tools).
Native panel specs: Check the monitor's spec sheet for:
- VESA mounting pattern (75mm, 100mm, or 200mm grid)
- Maximum weight the monitor can support on a VESA arm
- Power consumption in watts
- Native cable inputs (HDMI, DisplayPort, USB-C)
Curved or ultrawide panels? Curved monitors shift their center of gravity forward. An arm rated for 15 lbs might sag under a curved 13-lb monitor if the weight isn't balanced. Ultrawide displays are heavier and wider, requiring a stiffer arm.
Your Host Device & Power Delivery
What's powering the monitor?
- A laptop via USB-C dock or direct display connection?
- A desktop PC with its own power supply?
- A gaming console?
If you want a single-cable setup (laptop charges and drives the monitor from one dock), the dock must deliver enough wattage to charge your laptop and enough display bandwidth to the monitor simultaneously. A 60W dock won't charge a 96W MacBook Pro. A dock with a single USB-C output can't drive two 4K displays. No shortcuts here. Learn how standardization impacts one-cable setups in our USB-C monitor accessories guide.
Cable Standards: Stop the Guessing
This is where co-working space cable management gets tangled. Use the right spec from the start.
- HDMI 2.0: Maxes at 4K@30Hz or 1080p@120Hz. If you're buying a 144Hz monitor, HDMI 2.0 will cripple it to 60Hz.
- HDMI 2.1: Supports 4K@120Hz and 8K. Rare on budget setups and older co-working desks.
- DisplayPort 1.4 HBR3: Industry standard for gaming and creative work. 1440p@144Hz is routine; 4K@120Hz is achievable. If you see DP 1.2 or DP 1.3, the monitor will clock down.
- USB-C Alt Mode via dock: Carries video and power, but bandwidth varies. Budget docks (USB 3.1) max out at 1440p@120Hz; premium docks (Thunderbolt 4, USB4) can do 4K@120Hz and deliver 96W+ power.
Never buy a cable and hope it works. Match the cable spec to the monitor's native maximum refresh rate.
Power and bandwidth checklist:
- Monitor wattage identified from spec sheet
- Laptop/PC power requirement confirmed
- Dock power delivery (in watts) sufficient for your host device
- Display cable bandwidth (HDMI 2.1, DP 1.4, USB4) matches monitor capability
- No single point of failure (e.g., 60W dock for 96W laptop)
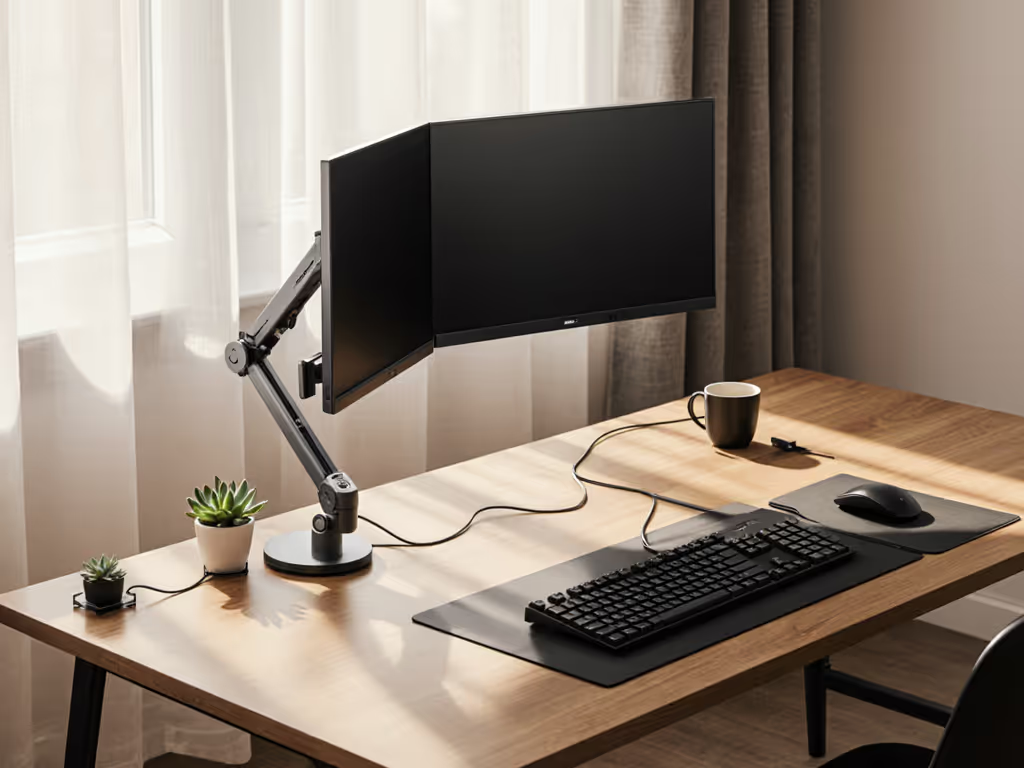
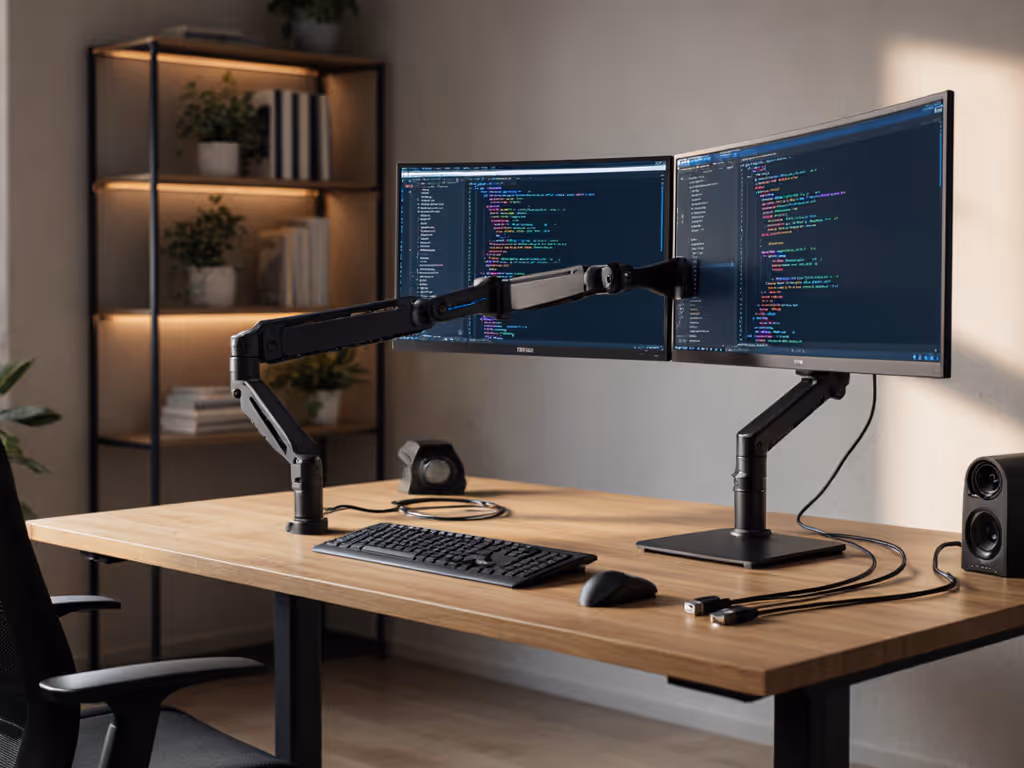
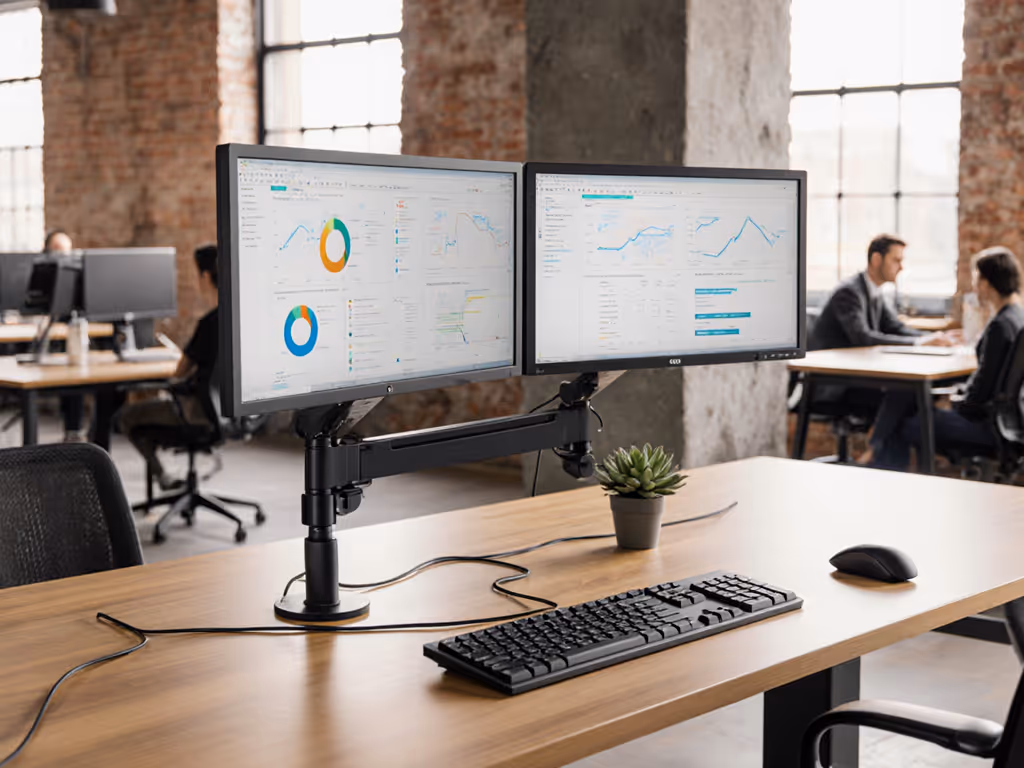
Step 3: Selecting Your Mounted Monitor Stand - The Backbone of $40-80
A good arm or stand frees desk space, puts your monitor at eye level, and eliminates neck strain. It's the foundation of a portable, ergonomic co-working setup.
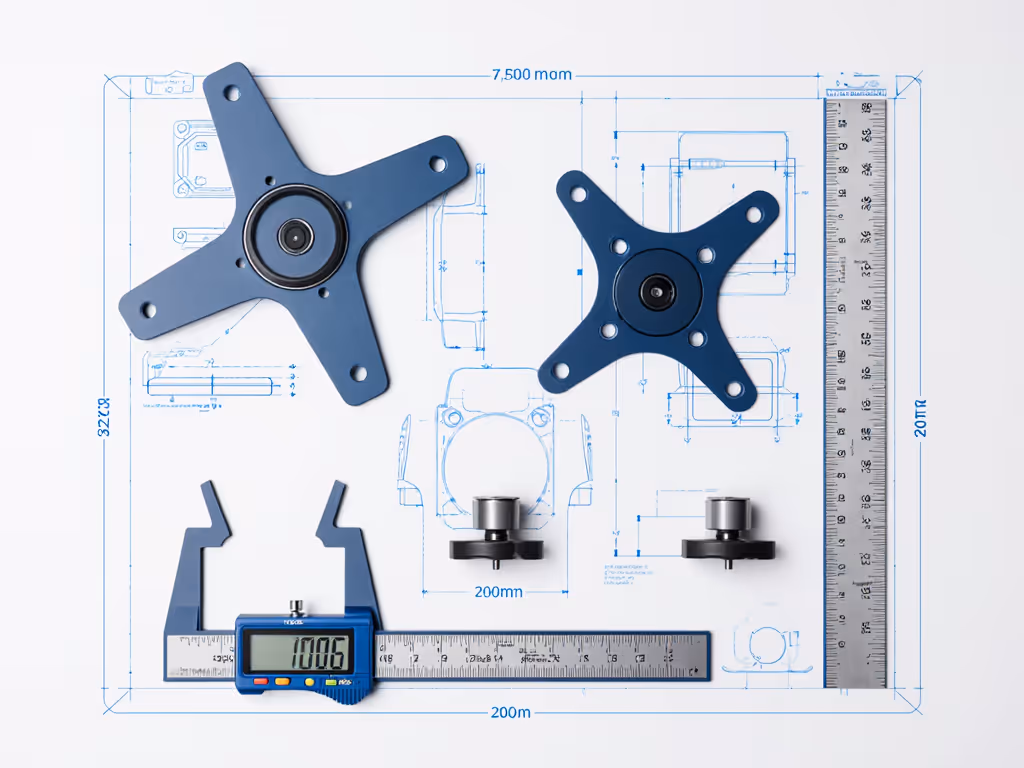
VESA Mounting: The Standard That Matters
Most monitors come with a VESA pattern - a rectangular hole grid on the back. Common sizes: For a visual primer on patterns and measurements, see VESA patterns explained.
- 75×75mm: Smaller monitors (21-24 inches), older displays
- 100×100mm: Mid-size monitors (24-27 inches)
- 200×100mm: Large, ultrawide, or premium displays (27+ inches)
Your arm must match the monitor's VESA pattern. Mismatches require adapter plates, which add cost, weight, and wobble. No adapters in a preflight (only direct fits).
Weight, Center of Gravity, and Sag Risk
An arm rated for 15 lbs can theoretically hold a 14-lb monitor, but only if the weight is balanced on the mount. Curved or ultrawide monitors have their weight concentrated forward, which causes sag over weeks or months. Budget arms ($20-40) use weak springs; quality arms ($60-80) maintain tension and resist drift. For a co-working bundle, invest in a mid-range arm from a brand with track record reviews (Ergotron, Vivo, or HUANUO), not the cheapest clone.
Clamp Type: C-Clamp vs. Grommet
C-clamp (desk-edge mount):
- Pros: Non-destructive, portable, reversible, fast to install
- Cons: Requires at least 2.5 inches of open desk edge and a surface thick enough (0.5-1.5 inches) to grip without slipping
- Best for: Co-working or rental desks where you can't drill
Grommet (threaded hole):
- Pros: Permanent, stable, no theft risk, doesn't consume desk edge real estate
- Cons: Requires drilling a hole; not an option in shared or rented desks
- Best for: Home offices or desks you own
For co-working, always choose a C-clamp. It's portable and non-destructive.
Clearance Validation: The Invisible Failures
This is where my arm collided with a shelf, creating a return I didn't need. Measure three clearance zones:
- Tilt and rotation range: When the monitor tilts up or down, or rotates left and right, does the arm bracket hit a wall, shelf, or nearby equipment?
- Retracted footprint: When you push the monitor back (arm fully extended), does it collide with anything? Does it protrude over a neighboring co-worker's desk?
- Height-adjustable desk: If your desk raises and lowers, test the arm at both minimum and maximum height. Does the clamp stay tight? Does the arm elbow bend without hitting the desk underside?
Arm selection checklist:
- VESA pattern confirmed (75, 100, or 200mm)
- Monitor weight and center of gravity assessed
- Arm weight capacity is at least 10 lbs above your monitor weight
- Clamp diameter or range fits your desk thickness
- Clamp includes a non-marking pad or surface protection
- Full tilt, rotation, and height clearance confirmed
- Arm brand has positive reviews for stability (no wobble in YouTube reviews)
Step 4: Cable Strategy & Shared Workspace Security
Under $200, you're not buying a premium $300 cable management ecosystem. But poor cable choices cascade into chaos.
The Right Cables, Not the Cheapest
A $3 HDMI cable from an unknown brand might work for a week, but it also might flicker under load, fail after a few unplug cycles, or drop signal when the dock powers on. Spend $12-18 on quality cables from Anker, Belkin, or Monoprice. You'll gain:
- Reinforced connectors that survive repeated unplugging
- Longer test certification and fewer surprise failures
- Clarity on spec (e.g., "HDMI 2.1 certified" vs. generic HDMI with no spec listed)
For quick-deploy monitor accessories, avoid surprise incompatibilities. If your monitor needs DisplayPort 1.4 to hit 144Hz, buy a DP 1.4 cable (not a DP 1.2 that will cripple refresh rate silently).
Labeling and Organization for Co-Working
In a shared space, chaos spreads fast. Label everything: To keep your desk tidy and snag-free, follow our cable management guide.
- Use a label maker or white electrical tape and permanent marker to tag each cable end: "Monitor HDMI," "Dock Power," "Mouse USB."
- Coil or velcro-strap cables neatly so someone doesn't yank the wrong cable and disconnect your work mid-Zoom call.
- Keep power and data cables separate to reduce electromagnetic interference (audio hiss or video noise).
Your Budget Cable Kit: Under $50
- 1× primary video cable (8-10 feet) matching your monitor spec: $12-18
- 1× monitor power cable or dock USB-C power: $8-12
- 2-3× velcro cable ties or fabric sleeves: $5-10
- 1× cable label set (printable or adhesive): $3-5
- Optional: 1× small cable lock or security strap: $10-20
Shared Workspace Security: Theft and Accidents
Co-working desks invite cable disconnection (either accidental tugging or deliberate removal if you step away). Mitigate:
- Velcro loop ties (not permanent, reversible): Secure cables to the arm or desk edge so they don't dangle or get snagged during standing-desk adjustments. Cost: $5-10.
- A small cable lock (optional): Wraps around the bundle or coiled cables; provides peace of mind if you leave the desk unattended. Cost: $15-25.
- Desktop cable raceway or clips: Routes cables along the underside of the desk, out of sight and protected. Cost: $10-20.
Cable management checklist:
- All cables labeled for quick identification and reconnection
- Velcro ties or clips applied to prevent loose dangling
- Power brick positioned safely (not under a monitor or where it can be kicked)
- No cables dangling over desk edge (tripping hazard)
- Disconnect sequence documented (e.g., "unplug dock first, then monitor") for quick teardown
- Cable specs cross-checked against monitor and device needs
Step 5: Assembly and First-Time Fit Validation
Your measurements are done, your hardware has arrived, and now you validate before the first day at co-working. This step separates confident setups from regretful ones.
Assembly: Four Steps
1. Install the VESA plate (if your monitor doesn't have one integrated).
- Position the plate against the monitor's rear mounting surface.
- Align the screw holes with the monitor's threaded inserts.
- Hand-tighten all four screws using a Phillips or hex driver. Stop when snug; over-tightening strips the insert and breaks the monitor.
2. Attach the monitor to the arm.
- Slide the arm's quick-release bracket into the VESA plate mounting points.
- Lock or tighten the latch. Verify the monitor doesn't wobble by gently shaking the screen. If wobble exists, re-seat and tighten.
3. Clamp the arm to the desk.
- Position the C-clamp at your pre-measured desk edge.
- If the desk surface is metal or glass, apply the included non-marking clamp pad to avoid scratches.
- Hand-tighten the clamp screw in quarter-turn increments. Do not crank it with a wrench; you'll warp the clamp head or crack a glass top.
- Once snug, test stability by pressing the monitor side-to-side. Minimal flex is normal; significant wobble means the clamp needs re-tightening or repositioning.
4. Route and plug in cables.
- Connect the monitor's power cable to the dock USB-C or a wall outlet (depending on your setup).
- Connect the video cable (HDMI or DisplayPort) from your laptop dock to the monitor's input port.
- If using a USB dock, connect the dock's power to the wall outlet.
- Allow 30 seconds for the monitor to detect the signal.
Validation: The First-Time Fit Checklist
Before you pack the bundle for co-working, sit down and test:
Physical stability:
- Monitor is level (use a phone bubble level app if you're unsure)
- Arm is not wobbling when you tap the monitor bezel
- Clamp is snug but not straining or creaking
- No cables pinch or kink at the monitor inputs
Ergonomic fit:
- Top of the monitor is at or slightly below eye level when you sit upright with shoulders relaxed
- Distance from your eyes to the monitor is 20-26 inches (approximately arm's length)
- Mouse and keyboard are within reach without leaning or straining
- Wrists rest neutrally on the keyboard (not bent up or down)
Display and cables:
- Monitor is detected by your laptop (appears in Display Settings or System Preferences)
- Video signal is stable; no flickering or "no signal" messages
- Refresh rate is at your intended setting (not downclocked to 60Hz if you paid for 144Hz)
- Resolution is correct (e.g., 1440p, not downscaled to 1080p due to a weak cable)
- Brightness and color are reasonable (not dim, washed out, or oversaturated)
- All cables are labeled and neatly routed
- Dock or USB hub powers up and recognizes connected peripherals (mouse, keyboard, external drives)
Confidence test: Sit at the desk for 30 minutes. Work as you normally would (typing, scrolling, watching video, or a conference call). Is your posture neutral? Do your wrists rest comfortably? Is the screen glare-free under typical office lighting? These details matter. A poor ergonomic setup will trigger back pain or eye strain by day three, and you'll regret the entire bundle. Dial in screen height with our ergonomic monitor height guide.
If something feels off (wobbling, glare, strain, or cables pinching), fix it now. Adjust the arm angle, reposition the monitor, or swap cables. Don't carry problems to the co-working space.
Step 6: Your Verified $200 Bundle - The Full Picture
Here's what a verified quick-deploy bundle for co-working looks like at the $200 price point:
If you're bringing your own monitor:
- Monitor stand/arm (C-clamp, VESA compatible, mid-range brand): $60-85
- Monitor (24-27 inch, 1080p or 1440p IPS): $100-140
- Video cable (HDMI 2.1 or DP 1.4, 8-10 feet): $12-18
- Power cable and velcro ties: $10-15
- Cable labels and small security strap: $8-12
- Total: ~$190-250
If the co-working space provides a monitor and dock:
- Monitor stand/arm alone: $60-85
- Video cable (if the provided cable is too short or wrong spec): $12-18
- Velcro ties and cable labels: $8-12
- Total: ~$80-115
The difference is dramatic. If you can use shared infrastructure (monitor, dock), your personal investment is just the arm, a backup cable, and organization tools. Portability and flexibility increase; cost plummets.
Actionable Next Steps: Your Preflight to First-Time Fit
Now you have the framework. Here's how to act:
Week 1: Measurement and Research
- Measure your co-working desk today. Use the five-dimension template from Step 1. Write it down. Don't skip this.
- Research one arm and one cable standard that match your desk and monitor specs. Read reviews specifically for clamp compatibility and arm wobble reports.
- If possible, visit the co-working desk and test-fit. Bring your measurements and a photo of the desk surface. Does the arm clamp grip it? Are there obstructions?
- Document monitor specs from the desk or your own display: VESA pattern, weight, native inputs, refresh rate.
Week 2: Purchase and Validate at Home
- Order your bundle. Stick to your parts list. Resist upsells or trendy add-ons. Discipline is clarity.
- Assemble and test everything at home. Don't wait until you arrive at co-working. Test the clamp, monitor display, cable specs, and your 30-minute ergonomic sit. Catch issues early when returns are friction-free.
- Take photos of your final setup. Note the monitor model, arm brand, cable specs, and any quirks (e.g., "clamp works best with padding on glass" or "refresh rate defaults to 60Hz; toggle to 120Hz in Display Settings"). You'll need these notes when you move desks or onboard a colleague.
Day 1 at Co-Working: Deploy Confidently
- Unpack and clamp the arm. Position it at your measured desk edge. Tighten carefully.
- Connect cables in the sequence you tested: monitor power, video cable, dock (if using).
- Verify display in your host device's settings. Confirm refresh rate, resolution, and signal stability.
- Settle in. Your preflight has eliminated surprises. Your first-time fit is validated. Work confidently.
Confidence comes from measurement. Your five-minute preflight - desk dimensions, monitor specs, power budget, arm compatibility, cable specs, and clamp validation - ensures that when you unbox your bundle, everything fits. No guessing. No returns. No wasted weeks chasing compatibility. Start with a preflight, end with a first-time fit.
Related Articles